Next Monday night I will be having a workshop and this is the gift I will give to the hostess. I always like to keep a small notebook in my purse for those occasions when I need a piece of paper. Usually my husband asking for one, and this fits the bill. I hope she likes it. You can make one as the supplies are readily available. Do you grocery shop? Yeah, don't we all ? I got these little notebooks at the grocery store for $1.09 for 8 of them. Pretty good huh?

So here is the inside of the notebook holder.

And here is how I did it, and you can too.
- Take a piece of not quite navy cs 6 3/8" x 5"
- Score at 3 and 3 1/4. (Putting the long side up against the top of the paper cutter). Fold the cs at the score lines.
- Decorate the front. I used 2 scallop circle punched pieces, one in orchard and one in white cs. Then centered another piece of orchard punched with the 1 1/4" circle punch.
- Use the boho blossoms punch, or any other small flower punches, to make several in orchard and at least one in not quite navy to go in the center of the circle.
- Attach two flowers to the circle with a brad and assemble. Adhere a couple of flowers to the front in a random pattern and touch the center of each with the white gel pen.
- Paper pierce the stem using the plastic grid from the mat pack as your guide to keep it straight.
- Adhere the notebook to the inside right side and you are done.

These are so cute and the assembling of them go so fast. You can click on any picture to enlarge it.
Thanks for stopping by At Paula's Place.
Any questions let me know. I would love to hear what you think of this. What it helpful? Did you make one?


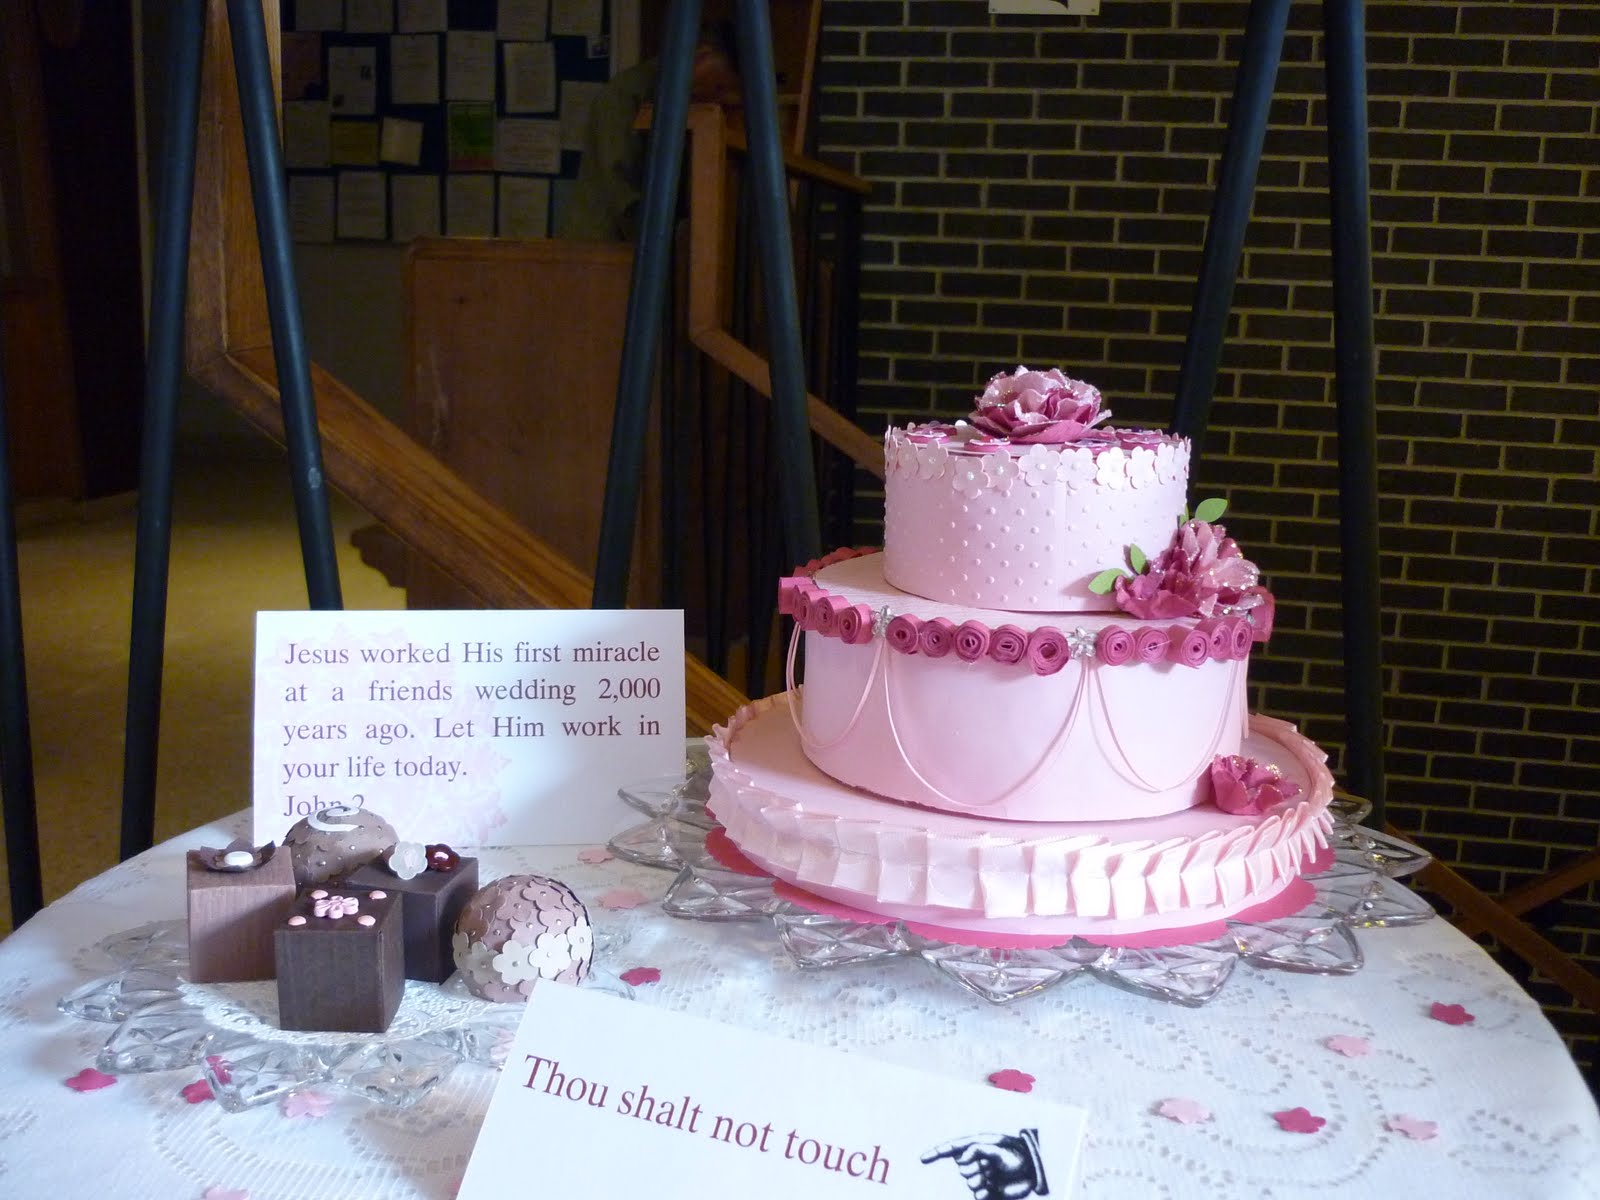 Yes, June is for weddings and the Success Magazine (only available for demo's) that came in May inspired me to make this cake. I changed it up a bit and made it smaller but had a great

