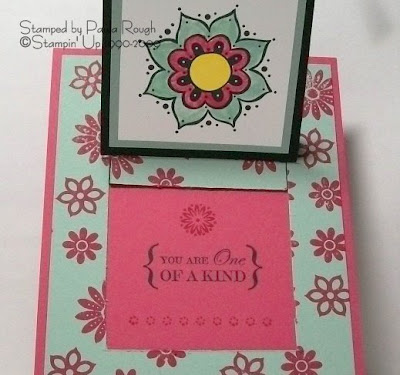
Well, on to the card. Today I have a pull card. Like anything else we do at stamping at first it may look complicated but once you know how to do it it is very simple. The one thing I will stress when you are making a pull card is to use sticky strip or sometime when someone is pulling that tab it might just fall apart.So this is how you do it.

- First on a piece of cs 4 " x 5 1/4" you stamp a bg on it. Here sage shadow cs is used and rose red ink
- cut out the sides and the bottom of a rectangle right in the center. That measures 2 1/2" x 3 1/4"
- punch half a circle out in the middle at the top
- Then score in 3 places. One at the top of the rectangle, another in the middle and the last one is just 1/2" from the bottom. Only as wide as the cut out part
- Cut a tab which measures 2 1/2" x 5" in basic black
- Using the tag corner punch on the tab cut the corners off
- Punch a hole right in the center with 1/4" punch and add ribbon
- Attach the tab to the bottom of the rectangle on the inside using sticky strip
- Put sticky strip on the bottom and both sides of the whole piece
- adhere it to a darker piece of cs in this case rose red.
- Stamp your main image on whisper white cs 2 1/4" square
- Back it with sage shadow cs 2 1/2" square, then black cs 2 3/4" square
- Pull the tab straight up and surprise, the message is revealed.

- I used a stamp a ma jig to center the sentiment just right.
Supplies: Pull Card
Stamp Set: One of a Kind 113624
Paper: Whisper white cs 100730, Sage Shadow cs 101563, Rose Red cs 102544,
Basic black cs 102851
Tools: Paper Cutter 104152, Stamp-A-Ma-Jig 101049, Tag Corner punch 107215,
aqua painter 103954
Ink: Basic Black Classic Stampin' Pad 101179,Yoyo Yellow Stampin' Write Marker 100050
Embellishments: Sticky Strip 104294
No comments:
Post a Comment